You were correct on the last one I did find a pdf file that I have now removed, that fixed the media report only. However this one is not listed on the media report, but

I am sorry. I assumed that you understood how to export that one person to a GEDCOM, and how to open that GEDCOM file in a text editor, and that you new how to search for a specific stri g of characters in that file. I am on my phone right now so maybe when I get back to my PC, I can type out step by steps…
I figured out how to open, but don’t know how to search
Thanks
Gene
Thanks for the before and after images where you changed PDF to JPG. But this doesn’t show that the PDF is no longer linked into your database. It only shows that the PDF is no longer tagged to the Census.
If you go to the main Media tab and fill in the search box with RA000000009, I suspect you will find that RA000000009.pdf and RA000000009.jpg are both there. I suspect that the media tags for RA000000009.pdf have been removed but that the main media link for RA000000009.pdf has not been removed. That is why you still have “phantom” links to the PDF files. The links are not phantom. They are real links. It’s just that the PDF files no longer have any media tags. A media link and a media tag are not at all the same thing.
That’s why I was asking for the exact procedure you are using to replace the PDF file with the JPG file. I suspect that you are removing the media tag for the PDF file and adding a media tag for the JPG file and that you were doing so from the Edit Person screen. Doing it that way will not remove the main media link to the PDF file from your database. Then when you delete the PDF file using Windows, you are stuck with a broken media link to the PDF file and that broken link is imported into RM7. It looks like you have phantom links. But as I already mentioned, the media links are not phantom. They are just real links media files and the media links don’t have any media tags.
The safe procedure in RM7 to replace a PDF file with a JPG file is as follows.
- Go into Lists => Media Gallery. Do not try to do it in Edit Person.
- Highlight the PDF file to be replaced. The best way to find the file is to switch to List view by clicking the List box at the bottom of the window and by typing at least a portion of the file name into the search box at the top of the window. In RM7, you have to click the looking glass icon for the search to take effect.
- Click the Properties box at the top of the window and the Change Media File box at the bottom of the window,
- Navigate to the JPG file and select it.
- Click Ok as many times as necessary.
The JPG file will now have replaced the PDF file and there will be no broken link to the PDF file. The advantage of this procedure is there may be more than one media tag for the file and the JPG file will replace the PDF file for every one of those media tags. You don’t have to go into the Edit Person screen for every single place that media file might have been used.
There is a similar procedure for RM8 for replacing one file with another, and I can go through it as well if you wish, but it sounds like you are still working primarily in RM7.
thank you Jerry I will try this
Jerry, Could you go through the process for RM8, as I am getting ready to convert to it?
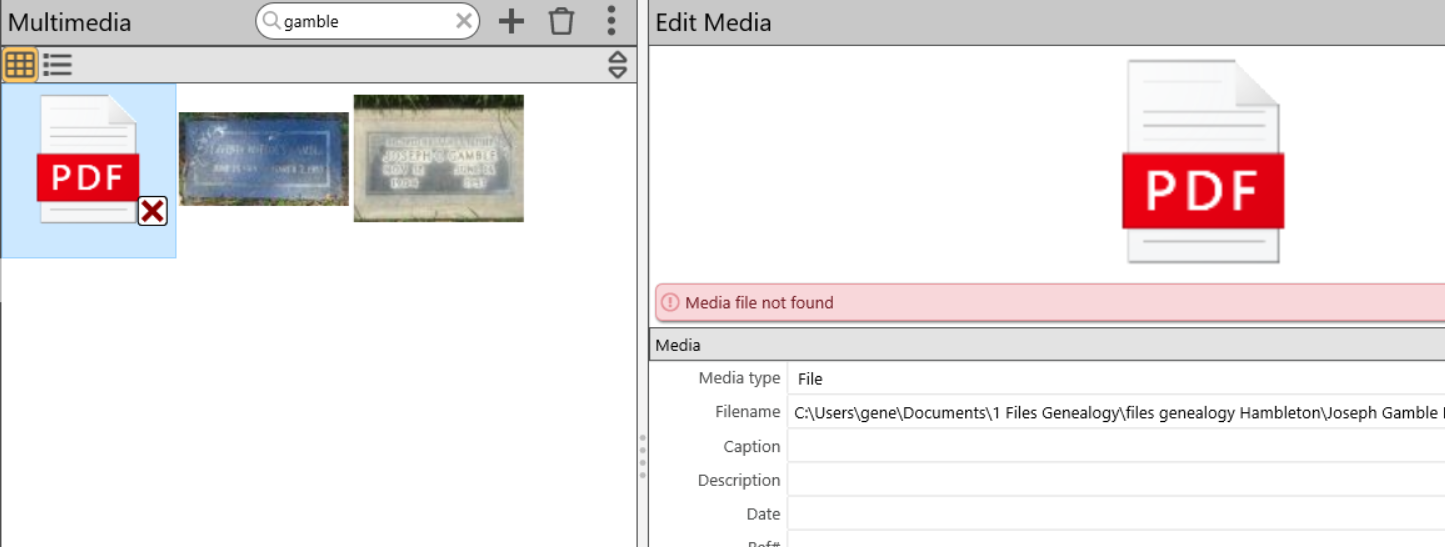
- Go to the main Media tab.
- It’s not 100% essential, but I find it helpful to switch from Thumbnail mode to Media List mode. The icons for the modes are just above the list of media files in the left hand panel.
- Find your media file and highlight it. You can scroll to find your media file, but the easiest way is usually to use the Search box. RM8’s Search boxes are one of its finer features.
- Highlight the file name in the right hand panel. The file name will actually be included with the full file path. Having done so, a teeny, tiny File icon will appear at the far right hand side of the screen. Click on that icon. This teeny, tiny File icon is not one of RM8’s finer features. It’s very hard to see even when it’s on the screen, and it’s impossible to know that you need to click on the file string to make the teeny, tiny File icon visible. The icon should be on the screen and easily visible at all times, preferably as a column in the left hand panel. And it should not be so teeny, tiny.
- You will now be in the Windows or Mac dialog for selecting files. You may have to navigate to the folder where the file is actually located and search for the file. This may not be very easy to do, and it also is not one of RM8’s finer features. In RM7, you would already be in the correct folder. In RM8, you will always start out in the default media folder. If your media files are all in the same folder and it’s the default media folder, this will be simpler. If you have a subfolder structure for your media files, this can be complicated.
- Select the replacement file by clicking on it and click Open.
1 Like
thank you, Jerry. I appreciate it.